
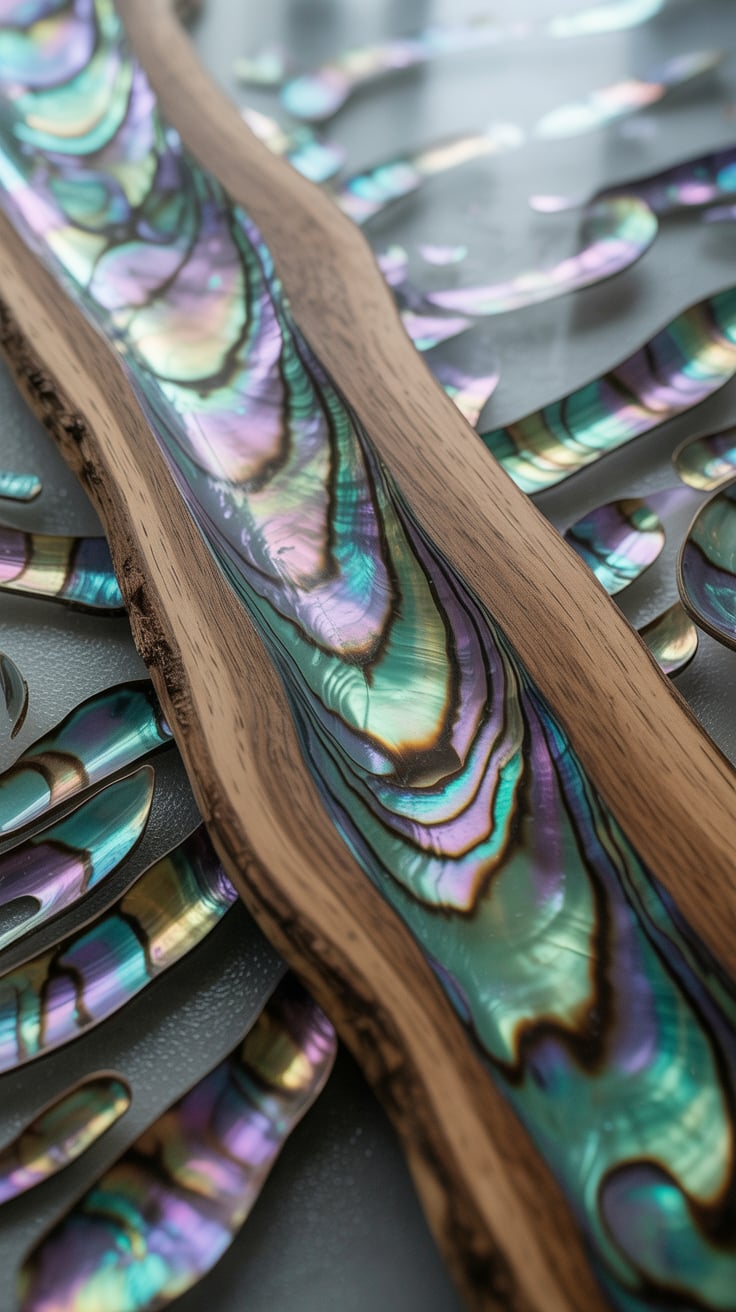
The abalone shell’s shifting iridescence—blues, greens, violets, and pearlescent highlights—has inspired makers for centuries. If you want to learn how to create an abalone effect on wood that looks luxurious yet organic, this guide gives you a complete, workshop-tested roadmap. You’ll see how to achieve the look using modern materials like mica pigments and epoxy resin, as well as traditional crushed shell and veneer, with pro tips for preparation, pouring, leveling, and finishing.
If you want ready-to-use patterns and project plans to practice on jewelry boxes, guitar headstocks, coasters, and more, browse the massive plan library at TedsWoodworking.
Table of Contents
What the Abalone Effect Is and When to Use It
The “abalone effect” on wood refers to any finish or inlay that mimics the nacreous, color-shifting look of abalone shell. In practice, makers create this effect in three main ways:
- Iridescent resin: A tinted clear resin filled with mica powders, color-shift pigments, or alcohol inks poured into carved recesses, natural cracks, or voids.
- Crushed shell inlay: Real abalone shell pieces crushed and inlaid with clear resin or CA glue to lock them in place.
- Shell veneer: Thin, real shell veneer applied to a recess and sealed with a clear topcoat.
When to use it:
- Accent inlays on jewelry boxes, bowls, instrument headstocks, and knife scales.
- Filling voids in live-edge slabs and river-style boards.
- Decorative motifs on tabletop corners, drawer pulls, and charcuterie boards (with food-safe finishing practices).
Best wood species:
- Tight-grained, lighter woods (maple, beech, cherry sapwood, birch) make the colors pop.
- Dark woods (walnut, wenge) deliver dramatic contrast, especially with bright teal/violet pigments.
- Open-pored woods (oak, ash) can work well after pore-filling to prevent color bleed.
Color choices and combinations:
- Classic abalone: teal + violet + pearl white, with a hint of gold.
- Deep ocean: navy + turquoise + black pearl.
- Warm shell: rose gold + champagne + lavender.
Depth and movement:
- Iridescence comes from layering and metallic particles catching light at different angles. Use translucent layers to build depth and create soft gradients rather than flat, opaque color.
Durability and maintenance:
- Properly cured resin inlay is durable for everyday use. For food-contact items, choose finishes and resins rated by the manufacturer for such use and follow best practices for cure times and cleaning.
Tip: Start with small projects to refine your techniques, then scale up to larger pieces like tabletops. If you need a practice-friendly project, consider a simple lidded box or coaster set featuring a carved abalone motif.
Tools, Materials, and Safety Essentials
A clean, well-equipped, and safe setup is the foundation for great results. Stock the essentials and establish a repeatable workflow.
Core materials:
- Epoxy resin or UV-stable casting resin (check manufacturer guidance for working time and thickness)
- Mica powders and/or chameleon color-shift powders
- Alcohol inks or resin dyes (transparent)
- Pearl or interference pigments (white/blue/violet)
- Crushed shell (optional) or shell veneer
- Masking tape, barrier tape, or modeling clay for dams
- CA glue and accelerator (for small fills)
- Finishes: waterborne polyurethane, conversion varnish, shellac, or hardwax oil
- Denatured alcohol or isopropyl alcohol for wipe-downs
Tools:
- Quality mixing cups and stir sticks (dedicated to resin)
- Precision scale or calibrated measuring cups
- Heat gun or small torch for bubbles
- Carving tools: trim router with inlay kit, Dremel, or small chisels
- Card scraper and block plane (for leveling)
- Random-orbit sander with grits from 80 to 2000 (depending on finish)
- Tinted markers or watercolor pencils for pre-shading recesses (optional)
- Soft brushes and foam applicators
- Nitrile gloves and shop towels
Safety and ventilation:
- Wear a NIOSH-approved respirator suitable for organic vapors when working with resins and solvents, plus safety glasses and nitrile gloves.
- Sanding resin requires dust protection; use vacuum extraction and a well-fitted particulate respirator.
- Keep your shop ventilated and control dust to avoid fish-eyes and contamination in your finish. For planning a compact, well-ventilated workflow, see UltimateSmallShop for smart shop layout ideas that don’t require a big budget.
If you’re building a station to handle sanding dust and resin work, a simple downdraft box makes a big difference.
Prepare the Wood Surface for Iridescent Inlay
Your prep work determines how cleanly the colors read and how crisp your edges look. Spend extra time here to avoid rework later.
Flatten and sand:
- Flatten the workpiece. On slabs, remove high spots with a router sled or thickness planer.
- Sand uniformly through the grits to at least 120–150 before carving. This gives your layout lines enough tooth to stick but keeps fibers from tearing out during routing.
Layout your design:
- Sketch flowing, shell-like lines—think waves, whorls, and soft arcs.
- Avoid tight, spiky angles; the abalone look is organic and benefits from curves and asymmetry.
- For repeatable designs, print a pattern and use carbon paper to transfer it.
Cut the recess:
- Use a trim router with an inlay kit or a Dremel with a base to cut 1.5–3 mm deep recesses. Deeper pockets create more “depth” but require more resin and longer cure times.
- Undercutting corners with a small chisel helps keep crisp edges that hold color without bleed.
Seal to prevent color bleed:
- End grain and open pores can wick pigment. Apply a thin seal coat of shellac or a compatible sanding sealer to the recess and surrounding area. Let dry, then scuff lightly.
- If the wood is very porous (oak, ash), pre-fill the pores before carving or apply multiple seal coats to reduce wicking.
Create dams and containment:
- Mask around the recess with quality painter’s tape or lay a thin bead of modeling clay to form a dam. Press firmly to avoid leaks.
- If you’re filling voids on live-edge slabs, staple on a polyethylene tape “backer” beneath the void so resin won’t drip through.
Dust control and cleaning:
- Right before pouring, vacuum and wipe down with denatured alcohol. Avoid tack cloths that can leave residue.
- Heat and humidity can affect resin; work within the manufacturer’s recommended conditions to minimize bubbles and cure issues.
A few practice runs on scrap can dial in your bit depth and feed rate before touching the real piece.
Step-by-step: Create an Abalone Effect on Wood
This workflow produces the signature pearlescent, color-shifting look while keeping control over boundaries and depth. Adjust to your resin’s pot life and your design’s complexity.
- Test your color palette
- On a scrap board sealed like your project, mix tiny batches and test your main colors: teal, violet, pearl, and a dark accent. See how they look at different concentrations, and under cool vs warm light.
- Add a small amount of interference or chameleon pigment to create the “shift” without overpowering your base tones.
- Mix and tint your resin
- Measure resin and hardener precisely, following the manufacturer’s ratio. Stir slowly to minimize bubbles and scrape cup sides and bottom.
- Split into several small cups and tint each with a different pigment set: translucent teal, translucent violet, pearl white, and a trace amount of black pearl or midnight blue for depth. Keep one cup of clear on hand.
- Pre-shade the recess (optional)
- Lightly tint the bottom of the recess with a marker or wash to create a shadow gradient. This gives the illusion of depth even in shallow inlays. Don’t overdo it—just a whisper.
- Pour in layers
- For thin recesses, a single pour can work; for deeper features, pour in 1–2 mm layers.
- Start with clear or lightly tinted resin as your base so light can penetrate and bounce back through the pigments above.
- Add movement
- Drop small ribbons of teal and violet into the base. Feather with a toothpick or fine stick to blend edges.
- Add pearl highlights last. A little goes a long way—too much pearl can look chalky.
- Use a heat gun briefly to pop surface bubbles. Keep it moving to avoid overheating or blowing resin out of bounds.
- Create the abalone shift
- Dust an almost invisible amount of interference blue or violet on the surface of a partly set layer, then seal with a clear top layer. This encapsulated dust creates that subtle, light-reactive shimmer.
- Control boundaries
- If a color is creeping, build a micro-dam by dropping a thin bead of thicker resin around the edge, wait a few minutes for viscosity to increase, then continue pouring.
- Cure and protect
- Cover the piece with a dust tent and let it cure fully per the manufacturer’s schedule. Cooler shops extend cure time; avoid moving the piece too soon.
Two advanced variations:
- Veined shell look: Drag a suction-cup hook lightly across a semi-gelled surface to create feathered veins. Fill back with a different translucent tone.
- “Fractured shell” mosaic: Pour a thin colored layer, let it partially gel, score lightly with a craft knife, then flood with clear. The edges catch light like broken nacre.
Inlay Options: Resin, Crushed Shell, and Veneer
There’s more than one way to achieve the abalone look. Match your method to the scale, detail, and durability you need.
Resin-only inlay
- Best for flowing lines, geode-like voids, and modern designs.
- Pros: Infinite colors, easy to level, durable after full cure.
- Cons: Requires careful sealing to prevent bleed; UV exposure may shift color if resin isn’t UV-stable.
Crushed shell inlay
- Technique: Pack crushed abalone into the recess and wick in thin CA glue or low-viscosity epoxy. Build up in thin passes, then level and polish.
- Pros: Genuine nacre sparkle; highly convincing under direct light.
- Cons: More sanding and leveling; irregular edges require patience.
- Source ethically and legally harvested material. Abalone is heavily regulated in many regions—purchase shell from reputable, legal suppliers.
Shell veneer inlay
- Technique: Rout a recess to veneer thickness, cut the veneer to shape, glue in place (epoxy or CA), and topcoat.
- Pros: Realistic look with less sanding than crushed shell.
- Cons: Veneer is brittle; requires precise cutting and a dead-flat recess.
Hybrid approach
- Roughly fill with resin for structure, sprinkle fine shell chips over the semi-gelled surface, then top with a thin clear coat. You get resin’s smoothness plus shell sparkle.
Practical tips:
- Contour gradients: Tint deeper zones darker to simulate thickness, and keep highlights near the surface.
- Containment: Shell pieces can snag sanding discs—level first with a sharp card scraper or small plane before switching to a sander.
- Exotherm control: Large voids can overheat resin. Pour in thin lifts and let each cool before continuing.
If your shop space is tight and you need a dedicated inlay/finishing corner with safe ventilation, the planning tips inside UltimateSmallShop can help you organize without expensive tools.
Finishing Touches to Reveal the Abalone Effect
Great pours can still look flat without proper leveling, sanding, and topcoating. The finish you choose also affects color fidelity and perceived depth.
Leveling and surfacing
- Start with a sharp card scraper to knock down proud resin or shell without smearing pigment or clogging sandpaper.
- Progress to a sander: 120 → 150 → 180 → 220, inspecting frequently under raking light. If the resin is soft, wait—sanding gummy resin clouds the surface and tears edges.
- For high-gloss surfaces, continue to 320 → 400 → 600 and beyond. Wet sanding from 800 to 2000 builds optical clarity for a “wet” look.
Topcoat choices and their effect
- Waterborne polyurethane: Minimal ambering; preserves cool blues and violets. Good for modern looks.
- Oil-based varnish or wiping poly: Adds warmth and contrast; shifts toward gold/green. Beautiful on dark woods, but can mute pure blues.
- Shellac: Excellent sealer; use dewaxed shellac under other finishes for compatibility.
- Hardwax oil: Satin-natural feel; preserves wood character with subtle depth over resin. Not as glassy as varnish or poly.
- Buffing compounds: After high-grit sanding, plastic-safe polishing compounds can produce mirror clarity on resin inlays.
Food-contact considerations
- For boards and utensils, follow manufacturer guidance for full cure and consider finishes known to be food-safe after cure. Many common finishes are considered food-safe when fully cured.
- Maintain surfaces by hand-washing and avoiding prolonged soaking or high heat.
Preventing defects
- Fisheyes: Clean oils and silicone from the surface before topcoating. Wipe with alcohol or a compatible cleaner.
- Amine blush (epoxy): Wash cured epoxy with water and a Scotch-Brite pad before sanding/finishing. Reference.
Lighting matters
- Evaluate your finish under multiple light sources. Cool LEDs emphasize blue/green; warm lights showcase gold/violet. Rotate the piece to confirm the “shift” reads from different angles.
Design Ideas, Project Plans, and Maintenance
Bring the abalone effect into projects that benefit from focal accents or flowing lines—then keep them looking sharp with simple care.
Design placements that sell the look
- Jewelry boxes: Border inlays around the lid, a central shell motif, or corner flourishes.
- Guitar headstocks and truss-rod covers: Classic shell territory; pair subtle pearl with dark woods.
- Bowls and turned pieces: Fill natural cracks and inclusions with color-shift resin.
- Tables and boards: Wave patterns across corners; “tidal pool” void fills along live edges.
- Knife scales: Thin, durable inlays along scales, sealed with a tough clear coat.
Pattern tips
- Flow with the grain rather than against it; curves that echo the wood’s lines feel intentional.
- Balance negative space. One strong abalone accent can be more striking than a field of color.
- Mix scales: Fine lines for elegance; larger pools for contemporary art pieces.
Practice projects with plans
- Try a lidded box, coaster set, or keepsake tray to refine your pour and finishing sequence. If you want hundreds of small-to-medium projects with clear step-by-step drawings, browse TedsWoodworking for pattern ideas that make perfect canvases for abalone accents.
Selling your work
- Abalone accents add perceived value and uniqueness—great for boutique markets, craft fairs, and online shops. If you’re exploring a part-time woodworking side income, the guidance in WoodProfits can help you plan offerings, pricing, and a practical startup approach.
Shop and workflow efficiency
- Keep a dedicated resin station with clearly labeled pigments and clean tools. Batch multiple small inlays at once to make the most of open time.
- If you’re outfitting a compact shop and want help with layout, ventilation, and tool priorities, see UltimateSmallShop for planning resources geared to small spaces.
Maintenance
- Clean with a damp cloth and mild soap; avoid harsh chemicals that can dull finishes.
- For high-gloss resin, occasional polishing revives clarity. Use plastic-safe polish and a soft pad.
- Repair small dings by spot-sanding and drop-filling with clear resin, then level and buff.
- Avoid prolonged UV exposure on pieces with non-UV-stable resins; use UV-resistant topcoats for added protection.
Idea bank
- Ocean wave charcuterie board with pearl foam at the crest.
- Nautilus or spiral motif on a keepsake box lid.
- “Geode” coasters with multi-layered iridescent centers and dark rims.
- Live-edge shelf with tidal-pool voids highlighted in teal/violet.
Conclusion
With careful surface prep, layered color strategy, and disciplined finishing, you can create an abalone effect on wood that looks deep, luminous, and convincingly shell-like. Whether you favor resin-only swirls, real crushed shell sparkle, or precise shell veneer, the keys are clean boundaries, subtle gradients, and a finish that preserves clarity. Start on small projects, document your pigment ratios and steps, and repeat what works. Once you master how to create an abalone effect on wood, those shimmering accents can transform everything from keepsake boxes to statement tabletops—and even become a signature detail in your work.
FAQ
What materials do I need to create an abalone effect on wood?
You’ll need a clear casting resin (epoxy), mica or color-shift pigments, alcohol inks or transparent dyes, good masking tape, a heat gun for bubbles, and finishing supplies. For alternate approaches, use crushed shell or shell veneer.
Is resin the only way to achieve the abalone look?
No. Real crushed shell in clear binder or thin shell veneer inlay can produce an authentic nacre look. Resin provides color control and smooth leveling, while real shell offers natural sparkle.
How do I prevent color bleeding into the wood?
Seal the recess and surrounding area with a light coat of dewaxed shellac or compatible sanding sealer before pouring. For open-pored woods, pore-fill first or apply multiple seal coats.
What pigments work best for the abalone effect on wood?
Use a combination of translucent dyes (for depth) and mica/chameleon pigments (for shimmer). Interference colors like blue or violet add the signature “shift.” Use pearl sparingly to avoid a chalky look.
How do I deal with bubbles in my resin inlay?
Stir slowly to reduce bubbles, warm your resin components slightly per manufacturer guidance, and pass a heat gun lightly over the surface right after pouring. Cover the work to prevent dust contamination during cure.