
Creating a collage is a meaningful way to celebrate memories, and building a frame to house it makes the result feel custom, polished, and worthy of your wall. This guide shows you how to make DIY collage picture frames—from choosing a story and designing the layout to building the frame, glazing, and hanging it safely. Whether you’re a new maker or a seasoned woodworker, you’ll learn practical techniques, archival tips, and finishing touches that help your collage look great for years.
If your workspace is tight and you want a tidy, pro-grade setup with a realistic budget, check out UltimateSmallShop for step-by-step guidance on organizing tools and creating efficient workflow in limited space.
Table of Contents
Decide on a collage story and frame style
Start with purpose. The story you’re telling determines size, materials, depth, and the mood of your DIY collage picture frames.
Story prompts:
- Milestones: weddings, graduations, new baby, travel highlights
- Themes: color stories (blues/greens), decades (’90s polaroids), places (national parks)
- People: family heritage, kids’ art highlights, team season recap
Inventory your elements:
- Flat items: photos, postcards, tickets, stamps, maps, pressed leaves
- Low-profile 3D items: guitar picks, shells, buttons, coins, fabric swatches
- Label space: captions, dates, quotes, song lyrics
Choose frame depth:
- Standard frame (3/4 in thick moulding) for flat paper collage with mat board
- Shadow box (1.5–3 in interior depth) for 3D objects and layered reliefs
- Hybrid: standard frame with 1/4–3/8 in spacers to keep glass off the collage
Select a frame style:
- Modern minimal: straight-grain maple, thin profile, crisp miters
- Rustic: reclaimed barn wood, rounded over edges, visible grain
- Painted: pop-color hardwood/softwood with smooth enamel
- Vintage: ornate moulding with gilded wax and subtle distress
Decide on size:
- Work backward from your collage elements; arrange them on a table and measure the comfortable outer layout.
- Common sizes: 11×14, 16×20, 18×24. Shadow boxes often start at 12×12 or 16×20 for depth.
Tip: If you plan to rotate or add items, a shadow box with a removable back makes updating easy.
Color and contrast matter. Pull hues from your photos to harmonize with the frame and mat board. Warm woods (cherry, oak) complement sepia and earth tones; cool woods (maple, poplar painted white) suit black-and-white or minimalist looks.
Gather tools, materials, and safe adhesives
You can build a polished frame with a basic kit. Upgrades improve precision, but they’re not mandatory.
Essential tools:
- Miter saw or miter box with backsaw
- Measuring tape, combination square, pencil
- Clamps (4–8), band clamp or strap clamp for miters
- Orbital sander and sanding blocks (120–220 grit)
- Router with rabbeting bit or table saw with dado blade (to cut the rabbet)
- Utility knife, cutting mat, straightedge (for mat board)
- Drill/driver, small brad nails or point driver (for backing)
- Safety gear: eye protection, hearing protection, dust mask or respirator
Materials:
- Frame stock: 1×2 or custom-shaped moulding in hardwood or softwood
- Backing: acid-free mat board or foam core; for heavier builds, thin plywood plus mat board on top
- Glazing: glass (window or picture frame glass) or UV-protective acrylic
- Spacers: clear acrylic spacers, wood strips, or foam core strips
- Adhesives: pH-neutral PVA (bookbinder’s glue), archival double-sided tape, or wheat starch paste for paper
- Hanging hardware: D-rings, wire, sawtooth hanger, or French cleat for heavy shadow boxes
- Finishes: wood glue, wood filler, stain, paint, clear topcoat (waterborne poly or shellac), wax
- Dust cover: kraft paper for the back, double-sided tape
Adhesive safety and archival notes:
- For paper items you care about long-term, choose photo-safe, acid-free adhesives. See guidance on adhesives for paper from the Canadian Conservation Institute.
- Avoid hot glue directly on photos, rubber cement, and generic tapes—they can yellow and fail.
- Use photo corners or hinge mounting with acid-free tape to keep originals removable.
- Consider UV-filter acrylic to reduce fading.
If you’ll be cutting and sanding often, remember wood dust safety—use extraction and wear a respirator. Learn more at the Canadian Centre for Occupational Health and Safety.
Cut, sand, and prep the frame components
A crisp, square frame begins with accurate cuts and a clean rabbet to hold glazing and the collage sandwich.
- Mill and measure
- Select straight, flat boards. If using 1x2s (3/4 in x 1.5 in actual), decide which edge faces outward.
- Determine frame opening: add twice the moulding width to your desired view area to find outside size. Example: For a 16×20 collage view with 1.5 in moulding, outside size ≈ 19×23.
- Cut the rabbet
- The rabbet is an L-shaped recess on the back of each rail to accept the glass/acrylic, mat/collage, and backing.
- Typical rabbet: 3/8 in deep x 3/8–1/2 in wide.
- Use a router with a rabbeting bit and bearing, or a table saw with dado stack. Make test cuts on scrap for fit.
- Miter the corners
- Set your miter saw at 45 degrees. Cut opposite sides to identical length for tight corners.
- Sneak up on final length: cut proud, then trim to fit.
- Dry-fit all four rails around your glazing/backing mockup. Edges should meet with no gaps.
- Sand and ease edges
- Sand 120→150→180/220 grit. Slightly ease the front edges to resist chipping.
- If painting, fill pin knots or surface dings with wood filler and sand flush.
- Glue and clamp
- Apply wood glue to miter faces; assemble using a band clamp or four corner clamps.
- Check for square: measure diagonals; they should match. Adjust clamps to square the frame.
- Optionally add 23-gauge pins, brads, or V-nails after glue sets to reinforce.
- Finish before glazing
- It’s easier to stain/paint and topcoat before installing the glass and artwork.
- Typical sequence: stain (if desired), seal with shellac or sanding sealer, then 2–3 coats of waterborne poly or lacquer, light sanding between coats.
- For a painted frame, use primer and two coats of enamel. Let cure fully.
If you prefer cut lists, jigs, and alternative joinery (splines, bridle joints, or pocket-screw frames for shadow boxes), browse the project libraries in TedsWoodworking. It’s helpful for adapting sizes and adding decorative profiles with repeatable precision.
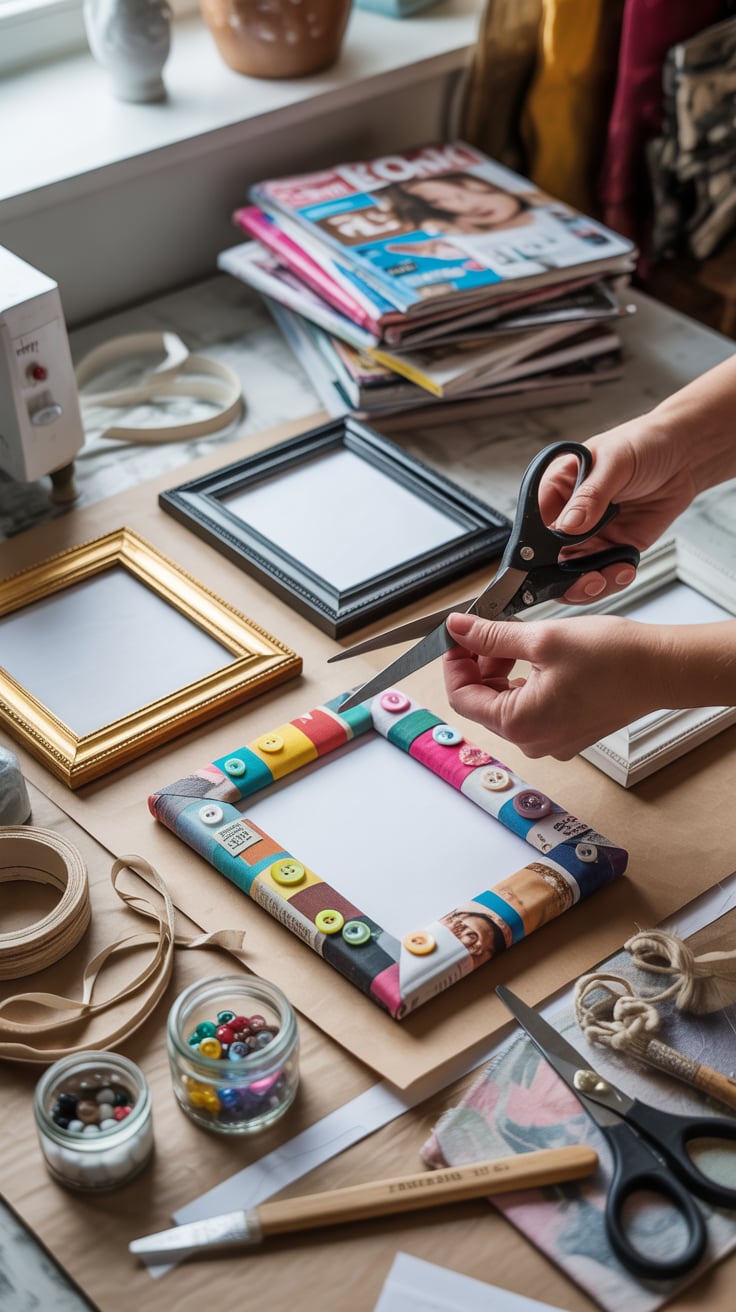
Design a balanced layout for photos and ephemera
Lay out your collage before you commit. Good design reduces visual clutter and helps your narrative pop.
Start with a blank canvas:
- Use an acid-free mat board or a sheet of neutral paper cut to your frame’s visible area.
- Establish margins: 1–2 in margins look balanced in mid-size frames; larger frames may benefit from 2–3 in margins.
Choose a composition strategy:
- Grid: clean, modern rows/columns using consistent spacing.
- Rule of thirds: place a key photo near a third intersection for a strong focal point.
- Radial or spiral: lead the eye around souvenirs (ticket stubs) toward a centerpiece.
- Layered banding: background map base, medium photos mid-layer, small accents on top.
Balance and rhythm:
- Mix orientations (portrait/landscape) thoughtfully—cluster three small images against one larger anchor.
- Repeat colors and shapes to build cohesion. For example, echo a sky-blue postcard with blue washi accents.
- Keep breathing room; crowding reduces impact.
Mockup and iterate:
- Photograph each arrangement on your phone to compare versions side-by-side.
- If including 3D items, test depth and clearance with temporary spacers.
Mounting choices:
- Archival photo corners: allow removal and protect originals.
- Hinge mount: use acid-free linen or Japanese paper hinges with wheat starch paste for larger prints.
- Archival double-sided tape: strong but less reversible; use sparingly on non-precious items.
- For fabric swatches, stitch tacks through a hidden foam board layer or use conservation-grade adhesive.
Typography and labeling:
- Print small captions on acid-free paper; keep type readable (9–12 pt).
- Use consistent label style throughout the collage.
If you want to preserve heirlooms, review the Library of Congress tips on caring for photographs for storage and display best practices: Library of Congress Preservation.
Assemble the frame and mount the collage
With the frame finished and the design mocked up, you’re ready to build the sandwich and close it up.
Clean everything:
- Wipe the inside of the frame rabbet.
- Clean glass or acrylic with the correct cleaner; avoid ammonia on acrylic. Use microfiber to prevent lint.
Build the artwork stack from front to back:
- Glazing (glass or acrylic)
- Optional spacers to keep glazing off the collage
- Mat board or decorative background
- Collage elements, mounted to the background
- Backing board (acid-free foam core or mat board)
- Rigid support for heavy builds (thin plywood) if needed
Using spacers:
- Clear acrylic or wood strips glued in the rabbet create a uniform gap to protect the collage surface.
- For shallow relief elements, 1/4 in spacers are often enough; shadow boxes need more.
Securing the stack:
- Use a point driver to insert flexible points; or small brad nails driven partially, bent down to retain the backing.
- Check the face for dust before final closure; a can of compressed air helps.
Sealing the back:
- Apply double-sided tape along the frame back, then lay kraft paper to create a dust cover.
- Trim with a utility knife. This limits dust and insects.
Hardware:
- For frames up to ~24 in wide, install D-rings about one-third from the top on each side and add picture wire.
- For heavier shadow boxes, use a French cleat for secure, level hanging.
- Add felt bumpers on the bottom corners to protect walls.
Final check:
- Level the wire, ensure no rattle in the stack, and wipe fingerprints.
If you like to batch-build frames for gifts, jigs make this easy—miter sleds, spline jigs, and clamping corners. You’ll find repeatable processes and shop-made helper tools in resources like TedsWoodworking.
Create shadow box depth for 3D items
When your collage includes souvenirs with depth—ticket stubs pinned with a charm, medals, dried flowers—you’ll want a deeper frame.
Sizing the box:
- Measure the tallest object and add 1/4–1/2 in clearance between it and the glazing.
- Typical inside depth: 1.5–3 in. Build with wider moulding or add a secondary inner box.
Building the box:
- Use 1×3 or 1×4 stock for the sides; cut a rabbet deep enough for glazing and artwork.
- Consider spline-reinforced miters for strength. Splines add decorative contrast and resist corner stress.
- Alternatively, butt joints with glue and brads, then cover with a decorative face frame.
Interior mounting tricks:
- Foam core risers: mount elements to risers for layered depth.
- Pins/stitches: for textiles, stitch onto a fabric-wrapped mat board.
- Shelves/ledges: thin wood strips can support small objects unobtrusively.
Glazing choices:
- Acrylic is lighter and safer for deep frames; consider UV-filter acrylic to reduce fading.
- Avoid direct pressure on fragile items; use spacers and gentle cradles.
Back access:
- Use screw-on turn buttons or small brass hinges and a latch if you want a “curio cabinet” frame you can update.
- For a sealed display, attach the back with screws into predrilled pilot holes so you can service it later.
Weight and hanging:
- Shadow boxes get heavy fast. Choose wall anchors appropriate for your wall type and weight, or use a French cleat.
- For layout flexibility, mock up hanging positions with kraft paper templates before drilling.
You’ll pick up more layout and small-shop clamping tricks in UltimateSmallShop, especially for working comfortably with deeper boxes in limited space.
Add glass, backing, and hanging hardware
This is where you transform assembled parts into a professional piece ready for the wall.
Glazing: glass vs. acrylic
- Glass: more scratch-resistant, crisp look, heavier and breakable.
- Acrylic: lighter, safer, better for large or deep frames. Use a soft cloth; remove protective film last to limit dust.
- For sunlit rooms, look into UV-resistant acrylic or conservation glass.
Cleanroom habits:
- Work in a low-dust area. Wipe surfaces and let dust settle after sanding before glazing.
- Wear nitrile gloves to avoid fingerprints inside the frame.
Backing upgrades:
- Use acid-free foam core for lightness and stability.
- Add an internal moisture barrier (aluminum-laminated backing board) for high-humidity spaces if desired.
Hardware placement:
- D-rings: install 2–3 in from the top on each side; run wire with a slight upward bow.
- Sawtooth hangers: fine for small frames but not for heavy or precious pieces.
- French cleat: a beveled strip on frame and wall locks the piece level and is ideal for shadow boxes.
Wall safety:
- Find studs when possible; otherwise use rated anchors.
- Use two hooks spaced apart to prevent tilting.
Documentation:
- Tape a small envelope to the back with spare points, a hanging template, and a note on materials (UV acrylic, acid-free backing) to remember what you used.
Finishing touches, sealing, and long-term care
Small details elevate the final presentation and prolong the life of your collage.
Edge detailing:
- For wood frames, burnish edges lightly with a brown paper bag after the final coat for a silky feel.
- Add a thin gilding wax on inside edges for a subtle glow, especially on dark paint.
Matting and reveals:
- A double mat (1/4 in reveal) adds dimensionality to flat collages.
- Color mats can overwhelm; use neutrals unless a hue clearly complements the collage.
Sealing the environment:
- The kraft paper dust cover isn’t just cosmetic—it limits dust and pests.
- Add silicone bumpers on the back corners for ventilation and wall protection.
Light and humidity:
- Avoid direct sun, fireplaces, and bathrooms.
- Use UV-filter glazing; rotate displays for sensitive items like vintage prints and textiles.
Cleaning:
- For glass, standard glass cleaner on a cloth works; avoid overspray near the dust cover.
- For acrylic, use a plastic-safe cleaner and microfiber to prevent scratches.
Rotating content:
- If you plan seasonal collages, design your frame for easy access: flexible points or turn buttons make swaps fast.
- Keep a flat storage folder with acid-free sleeves for off-season pieces.
If you’re thinking of making multiple frames or selling custom collage frames locally, it can help to learn about pricing, simple marketing, and repeatable workflows. WoodProfits shares general guidance for turning woodworking skills into a small side business without large overhead—helpful if friends start asking for frames of their own.
For more on adhesive selection and paper care, see the conservation guidance above and this overview on collage and materials by MoMA Learning.
Bringing your DIY collage picture frames to life
Now you know how to make DIY collage picture frames that look polished, protect your keepsakes, and tell a compelling story. From choosing a theme and selecting safe adhesives to building a sturdy frame, assembling the artwork stack, and adding pro finishing touches, you’ve got a complete roadmap. Start with one memory—your last trip, a child’s milestone, a family heritage vignette—and build from there. If workspace constraints are holding you back, set up an efficient shop with UltimateSmallShop. And if you catch the bug, structured plans from TedsWoodworking and business guidance from WoodProfits can help you scale your new craft.
Frequently asked questions
What size should I choose for a collage frame?
Start by arranging your photos and items on a table to find a comfortable layout. Measure that footprint and add margins (1–2 in for mid-size frames). Common sizes are 11×14, 16×20, and 18×24. For 3D items, a 12×12 or 16×20 shadow box with 1.5–3 in depth works well.
What’s the best adhesive for photos and paper in a collage?
Use photo-safe, acid-free options: pH-neutral PVA, archival double-sided tape, wheat starch paste, or photo corners. Avoid hot glue, rubber cement, and generic pressure-sensitive tapes that can yellow. For more detail, see adhesive guidance from the Canadian Conservation Institute.
Should I use glass or acrylic for DIY collage picture frames?
Glass is scratch-resistant and suits smaller frames; acrylic is lighter, safer, and recommended for larger or deep shadow boxes. For heirlooms or bright rooms, choose UV-protective acrylic or conservation glass to reduce fading.
How do I keep photos from touching the glass?
Use spacers—clear acrylic, foam core strips, or wood—inside the rabbet to create a gap between glazing and artwork. Shadow boxes naturally provide this clearance.