
If you’re itching to make something beautiful with your hands, these easy DIY wooden art projects for beginners will get you from idea to gallery-worthy results without an expensive shop or years of experience. You’ll learn simple builds, beginner-safe tools, and finishing techniques that make your pieces look polished and professional, even on your very first weekend.
Looking for ready-to-use plans to follow step by step? Browse thousands of printable templates and patterns with TedsWoodworking to save time, mistakes, and guesswork.
Table of Contents
What you need to start: tools, wood, and safety
Starting simple keeps you motivated. A small kit of essential tools will carry you through dozens of projects:
- Measuring and marking: 12″ combination square, tape measure, pencil
- Cutting: handsaw or jigsaw; a miter saw is a great upgrade
- Drilling: corded or cordless drill/driver, a small set of bits
- Sanding: sanding block or random-orbit sander; grits 80, 120, 180, 220
- Clamping: a couple of 6–12″ F-clamps or quick clamps
- Gluing: wood glue (PVA), small brush or spreader, rags
- Finishing: foam brushes, lint-free cloths, painter’s tape, nitrile gloves
Beginner-friendly wood choices:
- Pine or whitewood: inexpensive, soft, very workable. Great for wall art and signs.
- Poplar: slightly harder, paints and stains predictably.
- Baltic birch plywood: stable, strong, and smooth; perfect for panels or geometric pieces.
- Cedar: light, fragrant, good for rustic looks and outdoor decor.
Buy boards that are straight, with minimal knots or cracks. For art panels, 1×2, 1×3, and 1×4 sizes are extremely versatile. Plywood offcuts are perfect for backing panels, shadow boxes, and sign blanks.
Safety basics you’ll actually use:
- Eye protection always; hearing protection for power tools.
- Clamp your work whenever you cut, drill, or sand.
- Keep cords clear of blades, let tools reach full speed, and make cuts slowly.
- Sand with the grain, and wear a dust mask when sanding or using finishes.
For a deeper dive into safe practices and dust awareness, see OSHA’s woodworking safety guidance (OSHA Woodworking eTool). For finishing technique fundamentals, Popular Woodworking’s finishing basics is a solid reference (Popular Woodworking).
Pro tip: Decide which edges will be “show faces,” then lightly break sharp edges with 220-grit for a clean, intentional look. If you want a full breakdown of tool choices and budget-friendly alternatives.
Easy DIY wooden art projects: geometric wall art
Geometric wall art is the perfect first build because it involves straight cuts, simple glue-ups, and easy customization with stain and paint. It looks intricate but comes together quickly.
Materials and tools:
- Backer: 1/2″ or 3/4″ plywood cut to your desired size (e.g., 18″ x 24″)
- Pattern strips: 1×2 pine or poplar, or ripped plywood strips
- Wood glue, clamps, brad nails (optional), sandpaper
- Stains/paints, clear topcoat, hanging hardware
Step-by-step:
Plan your pattern. Herringbone, chevrons, and 45-degree triangles are beginner-friendly. Sketch your layout on the plywood backer or use painter’s tape to mark reference lines. You can also print patterns: [Easy geometric wall art templates](INTERNAL LINK PLACEHOLDER).
Cut strips. Crosscut your 1x2s or plywood strips to slightly oversize lengths. For triangles or chevrons, set your miter saw to 45 degrees or use a miter box for hand-sawing.
Dry fit. Lay the first row from the centerline outward to keep symmetry. Adjust your angles and lengths until gaps are minimal.
Glue and clamp. Spread a thin, even coat of glue on the backer, place your first row, and clamp or weigh down. Use brad nails sparingly to pin pieces while the glue sets. Work a few rows at a time to avoid rushed alignment.
Trim the edges. After the glue cures, flip the panel and use a handsaw, jigsaw, or flush-trim router bit to cut the overhanging edges flush with the backer.
Sand and finish. Sand lightly to level uneven joints. Create contrast with alternating stains or paint blocks. A satin clear coat (water-based poly) preserves color and adds a clean sheen.
Hang. Install keyhole hangers or a French cleat for a professional, secure mount. See Family Handyman’s guide to hanging heavy frames (Family Handyman).
Design tips:
- Limit to 2–3 tones for a cohesive look.
- For a modern vibe, keep wood natural and pair with matte white.
- For rustic warmth, layer a light stain with subtle dry-brushed white.
Troubleshooting:
- Gaps at miters: Sand mating edges lightly, or shift layout from center again.
- Warping: Use enough glue to avoid dry spots and clamp evenly from edges to center.
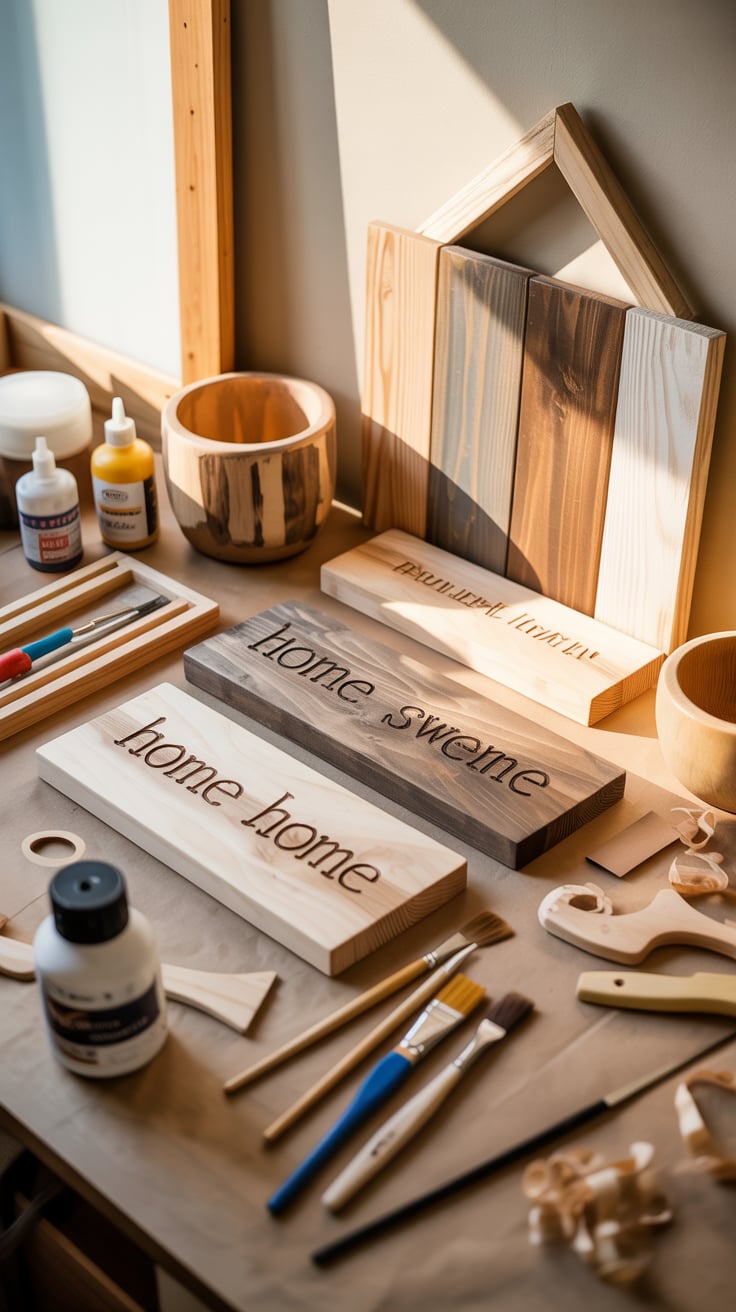
Easy DIY wooden art projects: personalized wooden signs
Sign art is simple, satisfying, and highly giftable. You can create a clean modern sign in an afternoon with minimal tools.
Materials and tools:
- Blank: 1×8 or 1×10 pine board, or glue up 1x4s to desired width
- Lettering: stencil, transfer paper, or vinyl cutouts
- Optional texture: woodburning pen, router with straight bit for shallow lettering
- Paint, stain, sealer, hanging hardware
Build steps:
Prepare the board. Cut to size (12–24″ wide is common), sand to 180–220 grit, and break sharp edges.
Decide background finish. Stain first for wood-tone backgrounds; let it dry per the can’s instructions. For painted backgrounds, a primer or thinned first coat helps avoid blotches.
Add lettering. Three beginner approaches:
- Stencil: Tape down a reusable stencil and apply light coats of paint with a foam brush. Pull the stencil when the paint is still slightly wet to avoid tearing.
- Transfer: Print the word or design, use graphite paper to trace onto the board, then fill in with paint pen or acrylics.
- Vinyl mask: Apply vinyl lettering, paint the board, then peel the vinyl to reveal crisp wood-tone letters.
Optional depth. Use a woodburning pen to outline letters for a hand-crafted look, or use a trim router with a shallow pass to recess letters and paint inside the recesses.
Seal and hang. Brush on a clear water-based polyurethane or spray lacquer in thin coats. Install sawtooth hangers or a small cleat for secure mounting.
Design ideas:
- Family name sign with established date in a script font.
- Minimalist quote in black on white with natural wood frame.
- Rustic market sign with distressed edges: scuff edges with 120 grit, then a light glaze of brown over white.
Common pitfalls:
- Bleed under the stencil: Use light coats and seal the stencil edges with clear finish before color paint.
- Blotchy stain on pine: Apply a pre-stain conditioner or opt for a gel stain that’s more forgiving.
For stencil techniques and paint types that won’t bleed, The Spruce Crafts has helpful how-tos (The Spruce Crafts). If you plan to sell signs later, save your vector files and size templates for repeatability.
Set up a small-space workshop that works
You don’t need a garage to build beautiful art. A tidy corner, a folding workbench, and thoughtful tool storage will help you work faster and safer—even in an apartment.
Layout basics:
- Define a 5×7′ workspace with a foldable table or portable workbench and a rubber mat to catch dust and protect floors.
- Keep a clamp rack and tool board within arm’s reach; put sanding/finishing in a separate plastic tote to control mess.
- Use a shop-vac with a fine dust bag and a short hose; vacuum after each cut and before finish.
Noise and dust considerations:
- Cut during reasonable hours and use hand tools for late-night sessions.
- Capture dust at the source; sand with a sander connected to the vac when possible.
- Leave finishes to dry in a ventilated area; water-based finishes off-gas less and dry faster.
Batch your workflow:
- Group all measuring and cutting first.
- Dry-fit assemblies, then glue and clamp multiple pieces at once.
- Sand and finish in batches so you aren’t opening finish cans every hour.
If you want a concise blueprint for a compact, efficient, and affordable setup, including space-saving tool picks and layouts, explore UltimateSmallShop – The Next Woodworking Blockbuster!. It’s a practical resource for turning tiny spaces into productive mini workshops.
For safe shop practices and ventilation basics, review OSHA’s general woodworking safety recommendations (OSHA Woodworking eTool). If you’re debating your first power tool upgrade, see [Beginner woodworking tools list](INTERNAL LINK PLACEHOLDER) for pros and cons based on project types.
Build a photo display board and string art
Two beginner projects, one panel: you can create a clean, modern photo display and an eye-catching string art piece using mostly the same tools and materials.
A. Minimal photo display board
- Cut a 1×8 or 1×10 to 18–24″.
- Sand to 180–220 grit and apply your finish of choice.
- Install 3–4 small eye screws across the front, then string twine between screws to create hanging lines.
- Clip photos with mini clothespins or binder clips.
- Optional: add a thin frame with 1×2 strips mitered at the corners for a gallery feel.
B. String art board
- Use a plywood or solid wood panel as your base, 10–16″ wide.
- Print a simple outline: heart, state shape, simple animal silhouette, or word in block letters. Tape it to your panel.
- Tap 3/4″ wire nails along the outline every 1/2–3/4″, then remove the paper.
- Tie embroidery floss to one nail and weave back and forth across the shape to fill in density. Outline the border last for a crisp edge.
Design variations:
- Dip-dye string colors or use ombré thread sets.
- Paint the panel a dark color and use bright white string for maximum contrast.
- For a rustic vibe, leave the board natural and torch the edges lightly for a shadowed frame.
Tips for success:
- Use shorter nails for thin boards to avoid blow-through.
- Keep consistent nail spacing; a piece of cardboard as a spacer works well.
- For photo boards, place eye screws symmetrically and pull twine snug—but not so tight it bows the screws.
Upgrades:
- Add a thin layout grid with pencil and erase after nails are set.
- Incorporate small metal tabs or hooks to hang keys or lanyards beneath your display.
If you’re new to finishing, Popular Woodworking’s finish basics will help you choose between oil, shellac, lacquer, and water-based poly (Popular Woodworking).
Craft a minimalist candle holder set
A sculptural tealight block or tapered candle pair is a quick project that looks high-end on shelves and dining tables. Work slowly and keep flame safety front-of-mind.
Materials and tools:
- Offcuts of 2×2, 2×4, or 4×4 lumber (pine or hardwood)
- Drill/driver and Forstner bit sized for your candles (usually 1-1/2″ for tealights)
- Sandpaper, finish (Danish oil, poly, or paint), adhesive felt pads
- Optional: miter saw for angled cuts, chisel for refining recesses
Tealight block steps:
- Cut your block to 8–12″ long.
- Mark hole centers evenly spaced (e.g., three tealights at 2-1/2″ centers).
- Clamp the block securely. Use a Forstner bit to drill flat-bottom holes about 3/8–1/2″ deep.
- Sand all surfaces and soften edges; ensure tealights sit slightly below the surface.
- Finish with oil for a rich look, or paint for modern contrast. Attach felt pads to protect surfaces.
Tapered candle holder pair:
- Cut two 6–8″ blocks. Miter the bottom at 5–10 degrees for a subtle lean, or cut a bevel on two sides for a faceted look.
- Drill candle holes sized for your taper sleeves or inserts; many tapered candles benefit from a metal bushing for fit and heat protection.
- Sand, finish, and add felt pads.
Safety notes:
- Always use fire-safe inserts when possible, and never leave burning candles unattended.
- Avoid film finishes inside recesses; leave those raw or use metal sleeves.
- Keep holders stable with a wide base and felt feet.
Styling ideas:
- Mix three heights for visual interest: 4″, 6″, and 8″.
- Use a dark stain on pine to mimic walnut, then top with satin poly.
- For Scandinavian minimalism, keep wood natural and pair with white candles.
For an extra-clean look, consider ebonizing (steel wool + vinegar solution) to react with tannins and produce deep gray/black tones. Test on scrap; results vary by species. For finish options that won’t yellow, a water-based poly is a great choice; see The Spruce Crafts comparison of finishes (The Spruce Crafts).
Finishing touches that make art gallery-worthy
A good finish elevates beginner builds into “where did you buy that?” territory. Focus on three pillars: surface prep, color, and protection.
Surface prep:
- Sand through the grits: 80 (shape), 120 (refine), 180 (pre-finish), 220 (final). Wipe dust between grits with a tack cloth or a lightly damp rag.
- Slightly round corners with 220 for a soft, intentional edge that resists chipping.
- Fill nail holes or small gaps with a color-matched wood filler, then resand.
Color choices:
- Stain: Wipe-on oil-based or water-based stains add warmth and highlight grain. Use pre-stain conditioner on blotch-prone woods like pine.
- Paint: High-quality acrylic or latex gives smooth color blocks; primer improves coverage. Use painter’s tape to create sharp edges and geometric shapes.
- Tint layers: Combine a light stain with a color wash (paint thinned with water) for complex tones without hiding grain.
- Texture: Try wire-brushing softwoods to accent grain, or lightly torch edges for a shadow frame. Test everything on scrap first.
Topcoats:
- Water-based polyurethane: Clear, fast-drying, minimal odor. Great for most art pieces.
- Oil/varnish blends (e.g., Danish oil): Soaks in for a natural feel, easy to refresh.
- Wax: Adds sheen and touch-smoothness over other finishes; not a primary protective coat for high-touch items.
Hanging and display:
- For panels: Use a French cleat for heavy art; sawtooth hangers for light pieces. Family Handyman’s pictures and hardware guide is a solid reference (Family Handyman).
- For shelf-style art: Add keyholes or D-rings and ensure you hit studs or use appropriate wall anchors.
- For table pieces: Add felt pads to avoid scratches and wobble.
Maintenance:
- Dust with a microfiber cloth; avoid soaking wood finishes.
- Refresh oil finishes annually; touch up paint chips with a matching color.
For a deeper technical dive into finish chemistry and application tips, Popular Woodworking’s finishing primers are excellent (Popular Woodworking). For an at-a-glance choice chart by project type.
Scale up your skills and next steps
As you complete a few easy DIY wooden art projects for beginners, you’ll naturally want to tackle bigger patterns, bolder colors, and cleaner joinery. A smart way to level up is to evolve each project with small changes rather than switching to complex builds all at once.
Upgrade ideas:
- Geometric wall art: Add a thin frame, experiment with diagonals beyond 45 degrees, or alternate board thicknesses for depth.
- Sign art: Try a layered sign—cut a second board into raised letters and glue them on for shadow lines.
- Photo boards: Incorporate a small shelf or hook strip beneath the photos for keys and sunglasses.
- Candle holders: Switch to hardwood offcuts like walnut or maple for crisp edges and a premium feel.
Workflow improvements:
- Make a simple crosscut jig for straight, repeatable cuts with a handsaw or jigsaw.
- Create finishing samples on scrap for your favorite stains and paints; label combos for quick decisions.
- Batch-produce small art pieces as gifts; you’ll learn repeatability and speed.
If you prefer step-by-step plans with clear diagrams for hundreds of wall art, decor, and small furniture projects, consider TedsWoodworking to shortcut layout math and avoid measurement errors. And if friends start asking to buy your pieces, you can learn the basics of pricing, packaging, and simple selling strategies with WoodProfits to turn your hobby into a pocket-money side gig.
For space-saving setups and tool choices that fit apartments or shared garages, UltimateSmallShop – The Next Woodworking Blockbuster! offers practical, budget-focused advice to make your workflow smoother.
Conclusion
The fastest route to confidence is building beautiful, useful pieces right away. With these easy DIY wooden art projects for beginners—geometric wall panels, clean sign art, photo displays, string art, and minimalist candle holders—you’ll practice the core skills that underpin every future project: measuring, cutting, sanding, finishing, and clean presentation. Keep experimenting with color and texture, document your favorite finishes, and upgrade your workspace as you grow. If you want a library of beginner-friendly plans to keep momentum, browse TedsWoodworking, set up your space with UltimateSmallShop – The Next Woodworking Blockbuster!, and explore turning your craft into income with WoodProfits. You’ve got this—make your first piece today and hang it proudly.
FAQ
What’s the easiest wooden art project for a true beginner?
A geometric wall art panel or a simple wooden sign is ideal. Both use straight cuts, basic sanding, and simple finishes. Start with pine or poplar, choose a small size like 12″ x 16″, and focus on clean sanding and a satin topcoat for a polished look. Use painter’s tape to keep lines crisp and practice on scrap first.What wood should I use for easy DIY wooden art projects for beginners?
Pine and poplar are affordable and forgiving. Baltic birch plywood is excellent for backer panels and remains flat. If you want a rustic look, cedar is lightweight and smells great. Avoid warped or knot-heavy boards, and buy a bit extra for mistakes and testing finishes.Do I need power tools to make these projects?
No. You can complete geometric art, signs, and photo boards with a handsaw, drill/driver, sanding block, and clamps. Power tools like a miter saw and random-orbit sander speed things up and improve consistency, but they’re optional. If you’re in a small space, consider compact, quiet tools and a folding workbench.How do I finish wooden art so it looks professional?
Surface prep is everything. Sand progressively through 120–180–220 grits, remove dust, and use a pre-stain conditioner on pine. Limit color palettes to 2–3 tones. Apply two to three thin coats of a water-based polyurethane for a clean, durable finish. See [Safe wood finishes guide](INTERNAL LINK PLACEHOLDER) for quick topcoat comparisons.What’s the best way to hang heavier wooden art securely?
Use a French cleat for heavier panels and D-rings with braided wire for medium pieces. Always anchor to studs when possible or use weight-rated wall anchors. Family Handyman has a clear guide to picking hardware and finding studs (Family Handyman).How can I practice without wasting wood?
Buy a couple of inexpensive 1×2 and 1×3 boards and a small piece of plywood. Make mini versions of each project—8″ or 10″ wide. Use these as finish swatches later. Keep offcuts to test stains, paints, and topcoats before committing to the final piece.Where can I find beginner-friendly plans and templates?
Printable patterns and measured drawings speed up learning. Consider TedsWoodworking for a large library of step-by-step plans, and check your local library or maker space for community resources. Save PDFs to a tablet so you can zoom in on diagrams at the bench.