
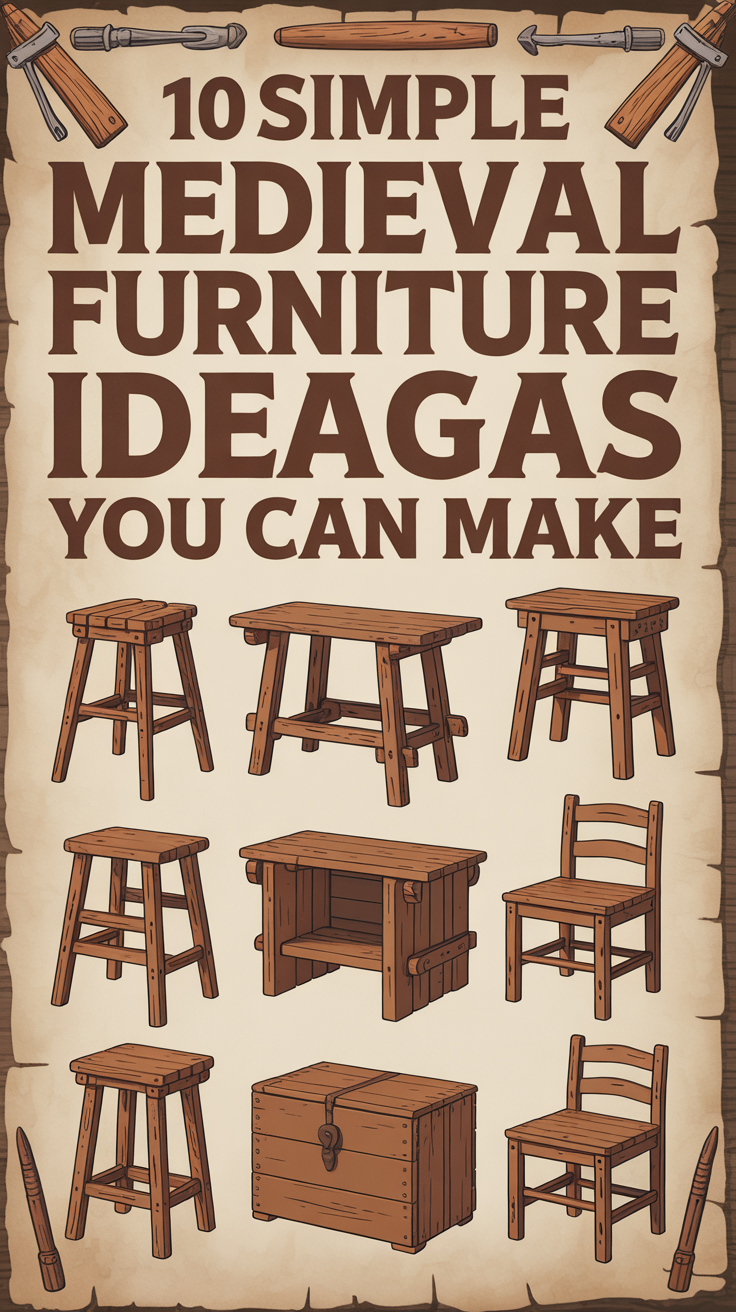
Medieval furniture has a rugged honesty that’s perfect for DIY woodworkers: thick boards, simple joinery, and forms that prioritize strength and function. With some basic tools and a weekend per build, you can bring the warmth of a medieval hall into your home. This guide walks you through 10 simple medieval furniture ideas you can make, with practical tips on materials, joinery, finishes, and period-appropriate details.
If you want ready-made templates and dimensions that match the projects below, a large plan library can speed things up. Check out TedsWoodworking for a broad set of simple bench, chest, table, and chair plans you can adapt to medieval styles.
Before you begin:
- Wood choices: Pine, fir, poplar, ash, and oak are all excellent. Oak and ash are sturdier; pine, fir, and poplar are easier to work and cheaper.
- Tooling: A circular saw (or handsaw), chisel set, mallet, drill, and plane will get you far. For authenticity, use hand tools; for efficiency, power tools are fine.
- Joinery: Medieval designs often relied on nails, pegs, and straightforward mortise-and-tenon connections. Tusk tenons, wedged tenons, and staked joinery (splayed legs) are both strong and beginner-friendly.
- Finishes: Boiled linseed oil, wax, and milk paint help achieve a period look.
Table of Contents
Benches and stools for the great hall
Medieval dining and daily life revolved around benches and stools—simple, portable, and sturdy. Start with these two approachable builds.
Idea 1: Trestle bench
- Concept: A thick seat board sits on two leg frames (trestles), joined with a stretcher for rigidity. Tusk tenons (a removable wedge through a slotted tenon) make it knockdown.
- Materials: 1.25–1.5 in thick boards for the seat; 1–1.25 in thick boards for legs and stretcher. Oak for permanence, pine for ease and price.
- Cut list overview:
- Seat: 1 board, 12–14 in deep, 48–60 in long.
- Trestle legs: 4 boards, 10–12 in wide, 18–20 in tall, shaped to a foot.
- Stretcher: 1 board, 4–5 in wide, 36–48 in long (as needed).
- Joinery:
- Leg pairs are connected by a crosspiece; the stretcher runs between trestles using tusk tenons. Cut a tenon on the stretcher ends, drill a 3/4 in hole through each trestle mortise, and add a vertical slot in the tenon for the wedge.
- Steps:
- Shape trestle legs with a gentle footed profile. Bore light relief holes near the bottom to reduce splitting.
- Lay out mortises for the stretcher; chop to a snug fit.
- Cut tenons on the stretcher ends and add a wedge slot.
- Screw or peg the legs to the underside of the seat. Fit the stretcher, insert wedges, and test for rock.
- Styling:
- Chamfer seat edges with a block plane.
- Add a shallow ogee or round to the trestle feet.
- Finish with linseed oil and a beeswax topcoat for a warm, period glow.
Idea 2: Three-legged milking stool (staked)
- Concept: A round or hewn seat with three splayed legs; very stable on uneven floors.
- Materials: Seat blank ~12 in diameter, 1.5–2 in thick; three 1.25–1.5 in round legs (straight dowels or rived sticks).
- Steps:
- Mark leg placement in a triangle about 1.5–2 in from the seat edge. Sight for a 10–15° splay outward.
- Bore mortises to the chosen angle with a brace and bit or angled drill guide.
- Taper the leg tops slightly (a pencil sharpener-style taper jig helps), and drive into the mortises with glue.
- Trim leg bottoms square to eliminate rock.
- Styling:
- Knife-cut chamfers around the seat’s edge.
- Carve a shallow saddle with a gouge for comfort.
- A milk paint undercoat with a light wax buff gives an authentic, worn-in look.
For visual references to medieval benches and seating forms, browse the collections at the V&A Museum and The Met Cloisters (see sources below).
Storage chests and coffers
A chest was the medieval closet, trunk, and bench all in one. Build one or both of these designs to capture the period feel and get practical storage.
Idea 3: Six-board chest (nailed construction)
- Concept: Fast, rugged, minimal joinery: front, back, two ends, bottom, and a simple lid.
- Materials: 3/4–1 in boards in pine or oak; forged-style strap hinges; hasp if desired.
- Cut list overview:
- Front/back: 2 boards equal length (e.g., 36–42 in).
- Ends: 2 boards with decorative feet cutouts (e.g., 18–20 in tall).
- Bottom: 1 board fit into grooves or nailed on.
- Lid: 1 board or edge-glued panel.
- Steps:
- Shape the ends with a simple footed silhouette. Cut a handhold slot if you like.
- Attach front and back to the ends with cut nails or pegs. Pre-drill to avoid splitting.
- Add the bottom: either plowed grooves in the ends and nailed to front/back or simply nailed around the perimeter.
- Hinge the lid with strap hinges. Add a hasp or simple wooden latch.
- Styling:
- Carve a date, border line, or rosette on the front.
- Stain lightly and oil-wax finish, or leave natural to darken with age.
Idea 4: Panelled coffer (frame-and-panel)
- Concept: A step up in skill, but still approachable: stiles and rails form a frame with floating panels; pegged mortise-and-tenon joints.
- Materials: 1–1.25 in stock for frames; 1/2–5/8 in panels; pine, oak, or poplar.
- Steps:
- Mill rails and stiles; cut mortise-and-tenon joints.
- Raise or bevel panels so they float within the frame grooves.
- Glue and peg the frame. Add a bottom panel in grooves or nailed battens.
- Hinge the lid; add an iron hasp or a wooden cleat lock.
- Styling:
- Carve simple Gothic arches on the upper rails or incise a border.
- Consider blackened iron strapwork for a bolder medieval look.
Useful references and imagery for period chests can be found via the Victoria and Albert Museum and The Met’s medieval collections (see Sources).
Trestle tables and removable boards
Feasting tables were often temporary: trestles with a removable board could be set up and stored quickly. Build a sturdy trestle table or a folding variant.
Idea 5: Classic trestle table
- Concept: Two trestle frames support a thick tabletop board; a central stretcher is locked with tusk tenons.
- Materials: Top 1–1.5 in thick; trestle posts and feet 1.25–1.5 in; stretcher 1–1.25 in.
- Steps:
- Shape trestle feet wide enough for stability. Mortise posts into feet.
- Add upper braces or cleats under the tabletop.
- Run a stretcher between trestles; cut tusk tenons; drill mortises; fit wedges.
- Attach the top with figure-8 fasteners or elongated screw holes to allow seasonal movement.
- Styling:
- Chamfer all exposed edges generously.
- Carve a stopped chamfer or bead along the trestle posts.
- Finish with oil and wax; optionally tone with a weak iron-vinegar solution for an aged effect.
Idea 6: Removable board with folding trestles
- Concept: Create two folding trestles (scissor-style or hinged legs) and a separate tabletop board that sits on battens.
- Steps:
- Build folding trestles using two legs each, connected with a pivot bolt or dowel; add a stretcher for rigidity.
- Edge-glue boards for the tabletop; screw battens underneath that align to the trestles.
- To set up, open trestles and drop the board in place; to store, fold and stack.
- Benefits:
- Perfect for small homes or shared spaces.
- Historical feel with modern convenience.
Mid-build tip: Working in tight spaces? A compact, efficient shop setup saves time and elevates results. UltimateSmallShop – The Next Woodworking Blockbuster! offers guidance to arrange tools, dust collection, and benches in a small footprint so you can tackle large tables without a full-size shop.
For wood movement principles that matter for table builds, see reputable resources from furniture conservation departments or museum publications (sources below).
Wall shelves, cupboards, and a simple aumbry
Storage on the wall kept valuables safe and surfaces clear. These pieces add medieval character while staying highly buildable.
Idea 7: Aumbry (small wall cupboard)
- Concept: A wall-mounted cabinet with one or two doors, often with pierced or slatted fronts.
- Materials: 3/4–1 in stock for carcass and door; 1/2 in panel for back; simple wooden turn latch.
- Steps:
- Build a box: top, bottom, two sides; glue and peg with dowels or cut nails.
- Add a grooved back panel or nail a shiplapped back.
- Make a simple frame-and-panel or board-and-batten door. For a period look, drill a pattern of small holes (quatrefoils or simple diamonds) and chisel to shape.
- Hang the door with small strap hinges and add a wooden latch.
- Install a shelf inside on pegged supports.
- Styling:
- Carve blind tracery along the door rails or cut a scalloped lower edge on the sides.
- Finish with milk paint (deep green, red, or black), then burnish with wax for a soft sheen.
Idea 8: Wall shelf with corbels
- Concept: A thick shelf board supported by two or three decorative corbels.
- Materials: 1–1.25 in shelf board; 3/4–1 in stock for corbels; hidden keyhole hangers or French cleat.
- Steps:
- Shape corbels with a simple ogee or trefoil cutout.
- Screw or peg corbels to the underside of the shelf.
- Mount with a French cleat or heavy-duty screws into studs.
- Styling:
- Knife-cut stop lines and chamfers.
- Apply a two-layer milk paint finish and rub back corners for a timeworn effect.
If you’re interested in period variations and motifs, the open-access collections at The British Museum and The Met feature examples of medieval wall cupboards and shelf adornments.
Beds and bed platforms with rope lattice
Sleep furniture was straightforward: frames with rope lattices or boards supporting mattresses stuffed with straw, wool, or feathers. This project blends history with modern comfort.
Idea 9: Simple rope bed
- Concept: Four posts joined by rails, with a drilled lattice for rope. A slat alternative works if you prefer.
- Materials: Posts 2–2.5 in square; rails 1–1.25 in thick; sisal or cotton rope; 1x slats if using a slatted base.
- Steps:
- Cut mortise-and-tenon joints to connect side and end rails to posts. Peg the joints.
- Lay out holes along the side rails and head/foot rails every 2–3 in for the rope lattice.
- Weave the rope tightly front-to-back and side-to-side. Traditionally, this is where “sleep tight” comes from—periodic re-tensioning kept the bed firm.
- Add a headboard panel if desired (board-and-batten or simple frame-and-panel).
- Styling:
- Chamfer post tops. Carve a simple line border or small rosette near the headboard.
- Finish with oil; optionally tint with a light pigment wash to emulate age.
Modern comfort tip:
- Put a breathable mattress on top (latex, cotton, or wool). If you prefer slats, skip the rope holes and install 1×3 slats on cleats along the rails. Leave space for airflow to prevent moisture build-up.
Historical context and images of medieval bedsteads appear in museum catalogues and conservation notes (see The Met and V&A links below).
Chairs, staked seats, and a tidy settle
Most medieval seating was backless or featured simple, high backs. These two builds give you both options with minimal fuss.
Idea 10: Board chair (stol) or “Viking” plank chair
- Concept: Two slotted boards intersect to form a surprisingly comfortable reclined chair. While often associated with earlier periods, plank chairs remained popular in rustic contexts.
- Materials: Two thick boards (1–1.5 in), about 10–12 in wide; one is the back/seat, the other the base.
- Steps:
- Cut the base board with a mortise near the top to receive the seat/back board.
- Taper the seat/back board so it slides through the base mortise and locks by geometry.
- Shape the headrest and a handhold cutout; soften edges with a plane.
- Optionally peg the joint for security.
- Styling:
- Carve simple linear motifs. Finish with oil and wax.
Alternative: Staked chair (splayed legs with a back)
- Concept: Similar to the milking stool but with a backrest board or spindles.
- Steps:
- Create a larger round or shield-shaped seat; bore three or four mortises at a splay for legs.
- Add a back post tenoned into the seat or a slotted backboard pegged into the seat’s rear.
- Fit legs and back; trim feet to eliminate rock; finish with oil.
- Benefits:
- Very stable on uneven floors and easy to move.
- Authentic silhouette with minimal tooling.
Simple settle (bench with back)
- Concept: A bench elevated by a high back panel; ideal for entryways, hearths, or dining nooks.
- Materials: Seat 12–15 in deep; back 30–36 in high; sides shaped to feet.
- Steps:
- Build a six-board bench; add a tall back panel and side wings.
- Peg everything together and add a hinged seat for storage if desired.
- Finish to match your other medieval pieces.
For ergonomics and historical forms, browse open-access imagery from The Met Cloisters and V&A medieval furniture collections.
Finishes, ironwork, and carved accents
What gives medieval furniture its unmistakable character is texture: tool marks, chamfers, and iron hardware. These details are easy to add and elevate simple builds.
- Chamfers and bevels:
- Plane broad chamfers along edges; stop chamfers before joints for a traditional look.
- Add a small lamb’s tongue detail at the stop for extra charm.
- Carving:
- Use a V-tool to incise borders, rosettes, or simplified Gothic arches.
- Chip carving on chest fronts: triangles, diamonds, and sunbursts create bold patterns without deep carving skills.
- Hardware:
- Strap hinges, hasps, clavos (decorative nails), and ring pulls add instant authenticity.
- Blacken off-the-shelf steel with a cold patina solution or heat and oil (carefully, with safety gear).
- Finishes:
- Boiled linseed oil followed by beeswax is classic.
- Milk paint undercoat with a scraped-back topcoat suggests age. Colors: deep red, black, green, or ochre.
- Iron-vinegar (acetic acid and steel wool) solution reacts with tannins for a gray-brown aged look, especially on oak.
- Surface texture:
- Leave subtle plane tracks or hewing marks; avoid over-sanding to plastic smoothness.
- Soften corners (medieval pieces weren’t razor-sharp).
If you want guided, step-by-step project plans and jigs for repeatable results, TedsWoodworking includes bench, chest, and table plans that adapt well to these medieval forms.
Recommended tools and plans for medieval builds
- Space-efficient shop setup:
- A small but organized workspace is often the difference between stalled and finished projects. UltimateSmallShop – The Next Woodworking Blockbuster! shows layouts and tool choices to maximize limited space—ideal when handling large trestle tables or bed rails.
- Plan libraries and templates:
- For printable cut lists and measured drawings, browse TedsWoodworking. Look for benches, six-board chests, trestle tables, and staked chairs you can tweak with medieval details.
- Outbuilding and storage:
- If you’re expanding into outdoor projects (shed for lumber storage, finish room), My Shed Plans provides a wide range of shed designs to protect your boards and tools.
Conclusion
The charm of these 10 simple medieval furniture ideas you can make lies in their straightforward construction and timeless forms. With basic boards, simple joinery, and a handful of tools, you can build benches, chests, tables, shelves, beds, and chairs that feel at home in both modern and historic interiors. Add chamfers, light carving, and hand-rubbed finishes to pull the look together. Whether you use hand tools or a compact power-tool setup, the projects above reward careful layout and patient finishing. If you want detailed drawings and shop-optimized workflows, plan libraries like TedsWoodworking and small-shop guidance from UltimateSmallShop can accelerate your builds from sketch to heirloom.
Frequently asked questions
What wood is best for simple medieval furniture ideas I can make at home?
Pine and poplar are easy and budget-friendly for beginners; oak and ash are truer to many period pieces and extremely durable. Mix as needed: oak for high-wear parts, pine for panels.
How do I get an authentic medieval look without advanced carving skills?
Focus on broad chamfers, stop chamfers with lamb’s tongues, light chip carving, and iron hardware. Finish with boiled linseed oil and wax or milk paint rubbed back at edges.
What basic tools do I need to build a chest, bench, or trestle table?
A saw (circular or handsaw), chisels, mallet, drill, measuring and marking tools, and a hand plane. A router and sander help, but are optional. Organize a small shop efficiently with UltimateSmallShop if space is tight.
Are tusk tenons and staked joinery strong enough for daily use?
Yes. Tusk tenons (wedged through tenons) and staked joints with proper splay are very strong. Pre-fit carefully, use quality wood, and don’t skip pegs or wedges.